
How to Add Users in Business Central with Multi-Entity Management
- Abhisar Sharma
- Apr 6
- 6 min read

Updated: 4 days ago

Struggling with a specific Business Central area? We’ll run a free 2-hour session with your team on that exact topic.
Part 1: Adding and Configuring Users in Business Central
Before a user can work in a Business Central environment where Multi-Entity Management (MEM) is installed, they must first exist in your Microsoft 365 tenant with the appropriate license. Once that is in place, the user is brought into Business Central and configured with both standard BC and MEM-specific permission sets.
If your team is new to Business Central and needs a foundational walkthrough on adding users, check out our step-by-step guide: How to Add Users in Business Central.
Step 1.1: Update Users from Microsoft 365
This action fetches the licensed user from your M365 tenant and populates them in Business Central.
Sign in to Business Central with an account that has the SUPER permission set. Only SUPER users can perform this administrative task.
In the top-right search bar, type Users and select the Users page from the search results.
In the ribbon, navigate to the Home tab and click Update users from Microsoft 365.
A confirmation dialog will appear. Click OK.
The new user will now appear in the Users list. At this point they have no access yet.
Tip: Synchronization between Microsoft 365 and Business Central is not instantaneous. After assigning a license in M365, wait a few minutes before running this sync.
Step 1.2: Assign Permission Sets
This is the most important step for security. Permission sets control exactly what a user can see and do within Business Central. When MEM is installed, users require both standard BC permission sets and MEM-specific ones.
On the Users page, click the user's Full Name to open their user card.
Scroll down to the User Permission Sets FastTab.
Standard BC Permission Sets
Assign the appropriate built-in BC permission set based on the user's license type. Some of the common Permission Sets are discussed below.
D365 BUS FULL ACCESS - For users with a Business Central Essentials license. Provides full access to core business functionality including finance, sales, purchasing, and projects.
LOGIN - Required for all users to access and authenticate into Business Central.
EXCEL EXPORT ACTION - Allows users to export lists, reports, and page data from Business Central to Excel.
LOCAL - System level permission used internally by Business Central for local operations and environment functionality.
MEM Permission Sets
For all the users, the following two MEM permission sets must also be added to their User Permission Sets:
BSSI MEM - Provides users with access to all MEM transactions but restricts access to the MEM Setup.
BSSI MEM TRANSACTION - Allows MEM administrators to perform transactions and update MEM setup settings.
Tip: If your organization uses custom permission sets, you can assign the BSSI MEM and BSSI MEM TRANSACTION permission sets at the group level rather than individually on each user card. This reduces manual effort and the chance of missed assignments.
Best Practice: Follow the principle of least privilege. Assign the most basic permission sets first and only add more as the user identifies a need to access specific pages or reports. To grant access to data in a specific company only, specify the Company on the permission set line. Leave it blank to allow access across all companies.
Step 1.3: Configure
This step sets the user's default working environment within Business Central.
On the Users page, select the user's row.
In the ribbon, navigate to the Navigate tab and click User Settings.
Set the following fields:
Profile ID: Determines the user's Role Center (homepage and primary navigation). Select the profile that aligns with the user's job function, such as Accountant, Sales Order Processor, or Business Manager.
Company: If your environment has multiple companies, set the default company that will load when the user signs in.
Tip: Choosing the right Profile ID reduces clutter and simplifies navigation. A sales person does not need to see the purchasing or manufacturing menus, and an accountant does not need a sales dashboard.
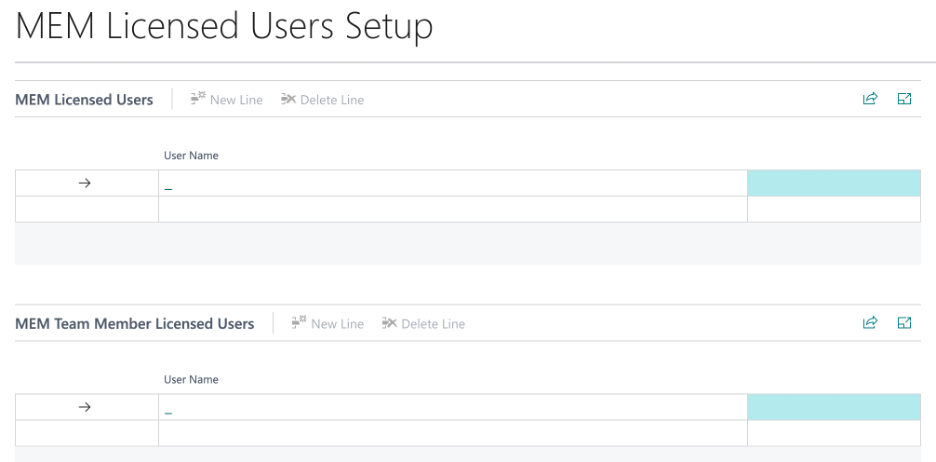
Part 2: Add the User to MEM Licensed Users Setup
All users who will work in a Business Central company where Multi-Entity Management is active must be registered on the MEM Licensed Users Setup page. This is a MEM-specific licensing requirement that is separate from the standard BC user configuration.
In the Business Central search bar, type MEM Licensed Users Setup and open the page.
Click New to add a line.
In the User ID field, select the user you have just configured in Part 1.
Save the record.
Note: Every user who accesses a company with MEM installed must be added to this page, regardless of whether they will actively use multi-entity features. If a user is not listed here, they will not be able to work in the environment.
Part 3: Configure Entity Access in MEM User Security Setup
Once the user is added to the MEM Licensed Users Setup, you must define which entities they are permitted to access. This is done through the MEM User Security Setup page, which controls user-entity relationships for data access.
User-entity access relationships determine what data a user can see. A user can only access records (such as vendors, customers, items, or transactions) when both the user and those records are associated with the same entity or entities. This works with Security Setup defined at the MEM Multi-Entity Management Setup screen.
Opening MEM User Security Setup
In the Business Central search bar, type MEM User Security Setup and open the page.
You will see a list of users. Locate the user you are configuring.
Under User Security tab, select each entity this user is permitted to access.
Save your changes.

Understanding Entity Security
The MEM User Security Setup works in conjunction with the security settings configured on the MEM Multi-Entity Management Setup page. Depending on which security options are enabled there, user-entity access controls may apply to any of the following record types:
Bank Accounts: Users can only select bank accounts belonging to their permitted entities.
Customers: Users can only select customers belonging to their permitted entities.
Vendors: Users can only select vendors belonging to their permitted entities.
Items: Users can only select items belonging to their permitted entities.
Locations: Users can only access locations belonging to their permitted entities.
Fixed Assets: Users can only access fixed asset records belonging to their permitted entities.
Jobs and Resources: Users can only access jobs and resources belonging to their permitted entities.
Note: If no entity security options are turned on in the Multi-Entity Management Setup page, all Business Central users will be able to see all records in the database regardless of entity. The MEM User Security Setup only takes effect for the record types where security has been explicitly enabled.
Best Practice: If a user should no longer have access to an entity, remove their entity relationship from the MEM User Security Setup page promptly. For users who leave the organization, disable their BC User Card first, then remove their M365 license. Never delete a user directly from Business Central, as this can break data references and audit history.
Summary: Full User Setup Checklist
Use this checklist to confirm all three stages are complete before a user begins working in a MEM environment:
Part 1 - BC User Configuration: User fetched from M365, BC permission sets assigned, MEM permission sets assigned (BSSI MEM and BSSI MEM TRANSACTION), Profile ID and default company set.
Part 2 - MEM Licensed Users Setup: User added to the MEM Licensed Users Setup page.
Part 3 - MEM Entity Access: User-entity relationships configured in MEM User Security Setup for all applicable record types.
If your team is new to Business Central and needs a foundational walkthrough on adding users, check out our step-by-step guide: How to Add Users in Business Central.
Struggling with a specific Business Central area? We’ll run a free 2-hour session with your team on that exact topic.
Evolve Advisory Group is a senior Microsoft Dynamics 365 Business Central consulting firm based in Calgary, specializing in inventory-intensive organizations. If you are evaluating Business Central as your next step, we offer a no-obligation discovery conversation to help you understand whether it is the right fit for your business.

Comments